Details
15 – 20
(approx 80 dumplings)
20 minutes
5 – 7 minutes
This week’s recipe is handmade gyoza, using my mom’s recipe for the filling. Just like a lot of families around the world have their own meatball / meatloaf recipes, dumpling fillings can range from family to family, and restaurant to restaurant. You could pretty much go to a variety of gyoza places back home in Japan, and experience a different flavor at each place!
My mom’s recipe is a fairly common one for the Tokyo area – a pork filling with cabbage, plenty of ginger, a little bit of garlic, and lots of chives. It’s a perfect summer snack, too, since the garlic and ginger help your body cope with the humid heat we get every year in Japan. Have some with iced roasted barley tea (mugi-cha) & a bowl of rice for a super satisfying meal, or just pair with a glass of beer (and skip the rice) for a fantastic (& surprisingly healthy) appetizer-type snack.
A note when you go shopping for pre-made gyoza wrappers – there are different kinds of dumpling wrappers, so make sure you pick the ones for gyoza. Wonton wrappers may work in a pinch, but egg roll wrappers will definitely be too thick for this recipe. If you choose to go low-carb or are gluten-sensitive, you can always substitute with vegetable-based wrappers instead, like cabbage or lettuce (I’ll work on making that an update soon).
Gyoza is traditionally cooked in a frying pan to make the bottom crispy (yaki-gyoza), but these dumplings can definitely be used in a broth (sui-gyoza) or even deep-fried (age-gyoza). I’ll plan to make these variations in an update as well.
Other variations on gyoza include vegetarian (tofu / mushroom) and shrimp dumpling variations, and I also eventually want to try my hand at “New York style” potstickers with the thicker, handmade wrapper, so it looks like I’ll be doing more dumpling updates here…as a dumpling lover, I’m definitely not complaining! I now have several bags of gyoza in my freezer, ready to go for the next time I get a craving – honestly, I feel it’s definitely better than the store-bought kind, but I’m obviously a tad biased in favor of mom’s home cooking. In the freezer, these keep for about a month (if they even last that long!).
I hope you try making these at home for a fun at-home activity while watching TV (if you’re solo) or while chatting (if you have friends or family over, which is how most families do their gyoza-making).
For an alternate Asian appetizer, definitely try my light, flaky Chinese Scallion Pancakes 🙂
Ingredients
- 1/2 lb ground pork
- 1/4 head green cabbage, minced
- 3 green onions, minced
- Handful of nira Japanese chives (can substitute Chinese or Western chives)
- 1 tsp salt
- 1 tsp garlic, minced
- 2 tblsp ginger, grated or minced
- 1/2 tbsp sake (does not have to be the expensive stuff)
- 1 tsp sesame oil
Directions
To a bowl with ground pork, add minced cabbage, minced scallions, and minced chives. “Chives” are a little different depending on where you are – if you can’t find Japanese “nira” chives, Chinese chives work. Western chives will work in a pinch.
Add salt, garlic, and ginger. The proportions of garlic and ginger is where most family / restaurant recipes are different. Some places focus on mostly garlic, and some on mostly ginger. Some gyoza-specialty restaurants will have all sorts of options on the kind of dumplings to order. Many people will mix them up for a flavor buffet!
Mix everything by hand – incorporating a kneading technique works well here.
Let sit for a minimum of half an hour to overnight in the fridge.
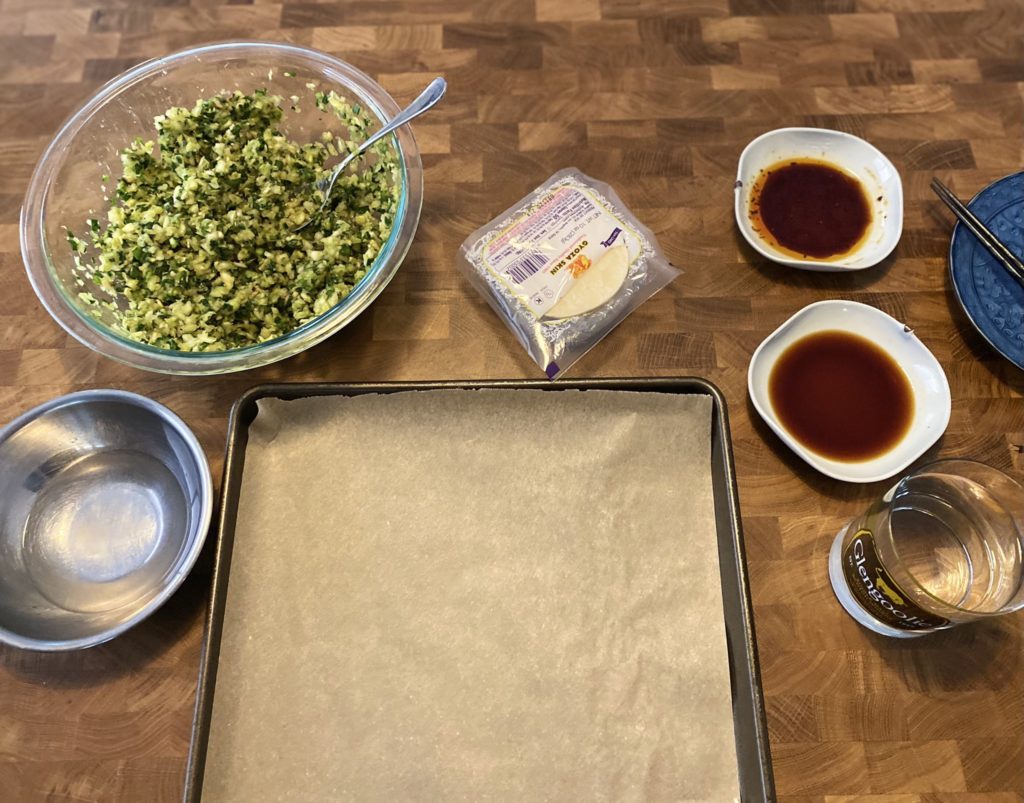
Prep your table for gyoza-making: a baking sheet with parchment paper, gyoza wrappers, filling, and some water for sealing.
Add a small spoonful of filling to the middle of the gyoza wrapper.
Wet the edges of the gyoza wrapper with your finger, then pleat the edges to seal the dumpling. You can do this by hand if you’re used to pleating. There are also inexpensive metal and plastic gyoza presses you can use, which are also super fun tools for a group activity.
Make sure the gyoza have a “bottom” to them by placing them upright on the parchment paper. This is super important when you cook the gyoza. The traditional frying pan method requires a crispy bottom and steamed top.
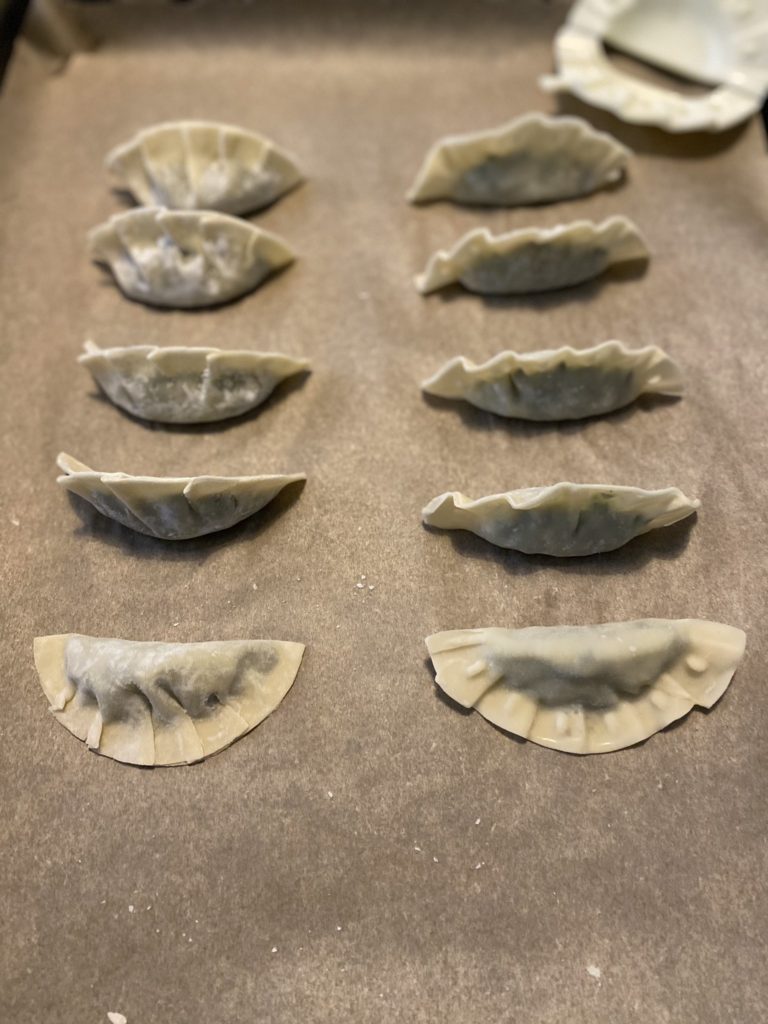
As you can see in the photo above, the gyoza on the left are pleated by hand; the ones on the right use the plastic press.
These gyoza freeze beautifully – just put them in a ziplock bag and throw into the freezer, simple as that. They keep for about a week n the fridge, and a month in the freezer (if they last that long!). Defrost before cooking.
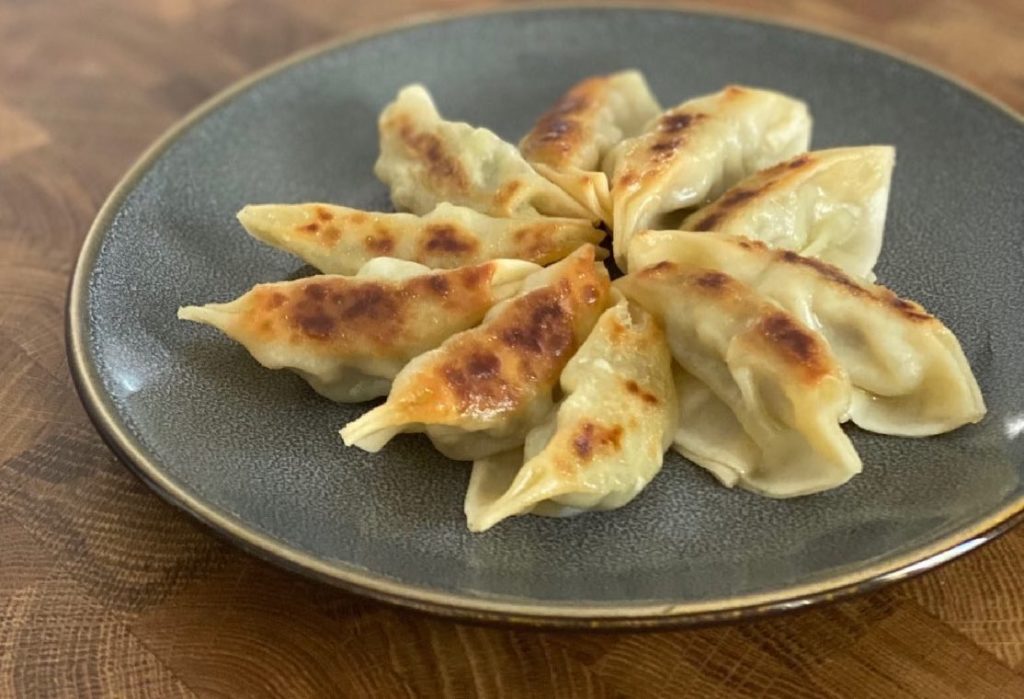
To cook, put some vegetable oil in a frying pan. Place gyoza bottom-side down over medium-low to medium heat. (If you’re using frozen, you don’t need to thaw them at all.)
Once the bottoms of the gyoza are golden-brown, add a couple of tablespoons of water to the frying pan. Cover with a lid to continue cooking the filling and to steam the wrappers, about 3-5 minutes.
Once filling is cooked through, drizzle sesame oil over / around the dumplings while in the frying pan. This is as a finishing oil (flavor / scent), so a little goes a long way here.
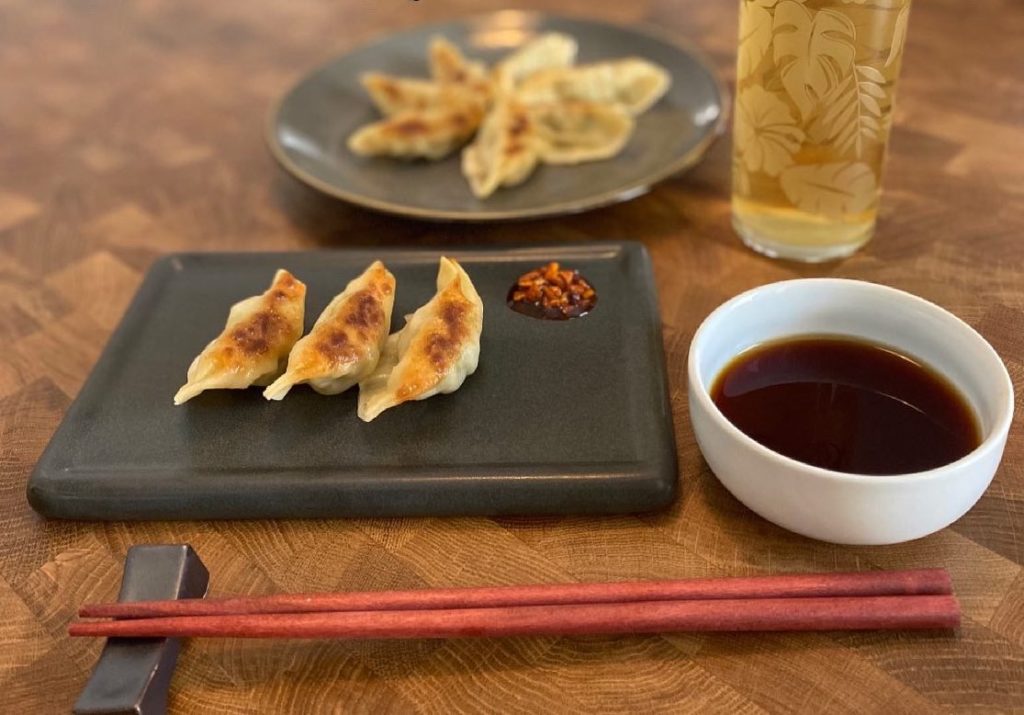
Arrange on a plate and serve with a dipping sauce. You can purchase dipping sauces commercially, or make your own. Most gyoza restaurants offer bottles of soy sauce, white vinegar, and chili oil – create your own sauce and enjoy!
Enjoy with a bowl of rice as a complete meal, or alone as a snack / appetizer.
You can totally get creative with gyoza fillings, from traditional to modern; I’ll be sure to make these other options in later episodes. I’ll also share some options on how to make “dumplings” that don’t even require pleats, so stay tuned for those!