Details
4-6
5 minutes, then 2-3 hours
45 minutes
This week has me trying a quicker “artisan style bread” recipe than ones I’ve tried before…and I share my mom’s 70s-era roasting pan as my substitute for the Dutch oven I have on my dream kitchen item list (those things are pricey!).
Honestly, I really liked this version compared to baguettes I’ve made in the past – it’s definitely less time-intensive. The size of the loaf is only determined by the size of the roasting pan (or Dutch oven), and any flavorings or fillings you’d like to fold in, so when they say it’s “artisan style bread,” the creativity is what can shine here.
For other bread recipes, try my Tuna & Tomato Tart, Orange Pecan French Toast, or my Stuffed Bagels.
Thoughts
One of these days, I should try to make my (not as professional, lol) version of Pompadour’s famous cheese-cube-infused French batard loaf using this artisan style bread recipe as a dupe – that was seriously one of my favorite snacks when I was growing up in Japan, and is one of the many, many things I miss about home. You can check out this legendary bakery at https://www.pompadour.co.jp/product/french.php.

Ingredients
- 3 cups Bread Flour
- 1 tsp Active Dry Yeast (not instant)
- 2 tsp Salt
- 360 mL Warm water
- Parchment paper
- Covered baking dish (can be a Dutch oven, but any oven-safe pot with a lid will work)
Directions
Part 1
In a large bowl, add 360 mL of warm (not hot) water, 1 tsp active dry yeast (not instant), & 2 tsp salt. Stir mixture.
Add 3 cups bread flour and stir with a spatula or wooden spoon (I prefer a silicone spatula). This will be a very wet, very loose dough. Do not turn this out onto a countertop to knead – this is a no-knead dough (woohoo).
Cover bowl with a kitchen towel and set aside for 2-3 hrs, until the dough doubles in size. The time will depend on whether it’s warm or cool in your kitchen, so take a peek at 2 hrs and see if it needs more time. The more often you make this, the more in tune you’ll get with how dough rises in your kitchen at different times of the year. If you’re in a very cold town in the middle of winter, you may want to give it extra time – the point is to let this double in size, rather than the time it takes to get there.
Part 2
About 30 min to an hour before you want to bake your artisan style bread, place your Dutch oven (or other well-sealing oven-safe vessel) in the oven and turn it on to 450 F / 230 C degrees – you want the container to get as hot as the oven before you put the dough in there. Once it reaches 450 / 230, leave it going for another 15-20 minutes.
Place a large piece of parchment paper onto your countertop, sprinkle a little flour on it, and then carefully pile the loose dough onto it. Use the spatula rather than your hands for this, and be gentle – you don’t want to mess up the air pockets that have formed from the dough rising!
Then, open the oven, take the lid off of the Dutch oven, and place the parchment paper + dough right into the baking vessel. This will all be EXTREMELY HOT, so please be super careful and use a heavy kitchen towel / pot holders / silicone oven gloves for this. Close everything back up – lid on pot, oven door closed – and bake for 35 minutes. Then, remove the lid from the Dutch oven / baking vessel, and bake for another 10 minutes until the crust is golden brown.
Part 3
Remove the Dutch oven / baking vessel from the oven (again, please be very careful and use heat protection), remove the artisan style bread by lifting up the parchment paper, and let the bread rest on a wire rack for about 15 minutes before slicing.
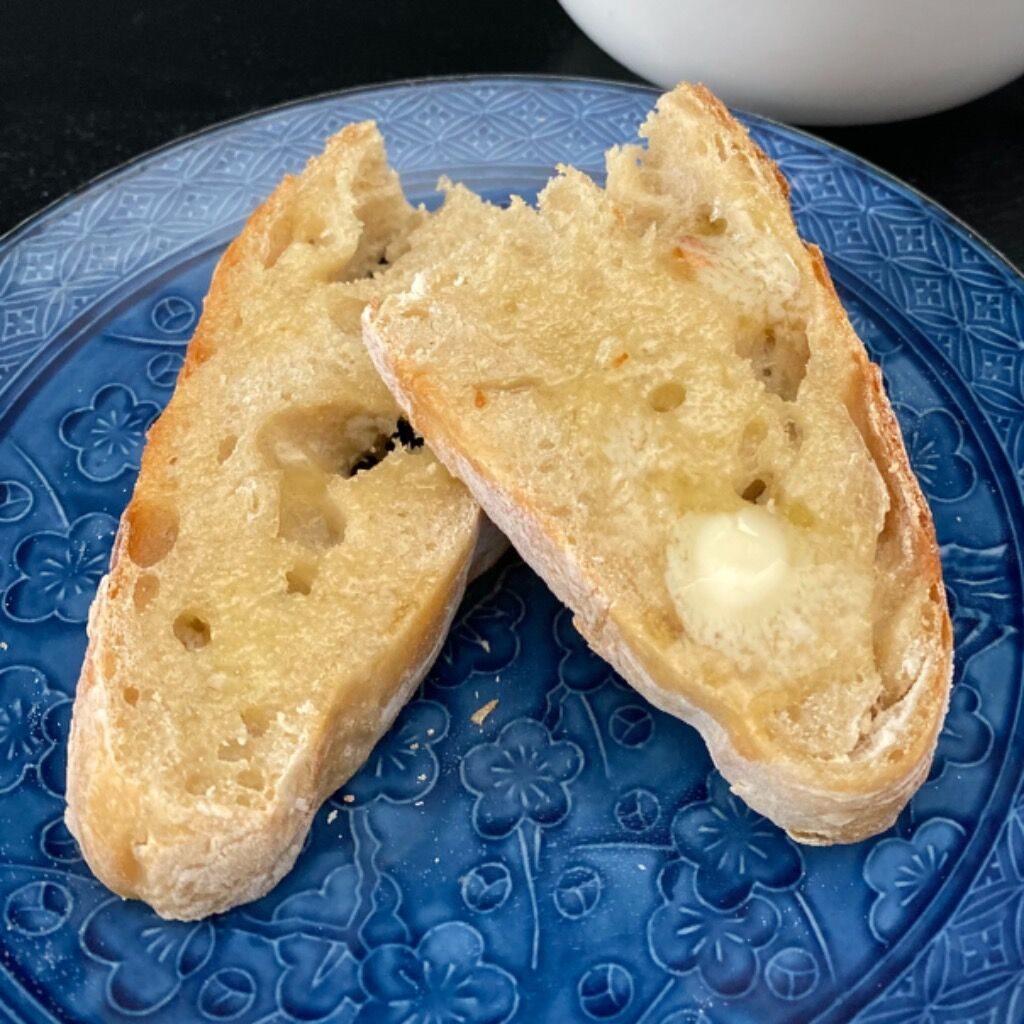
Enjoy with butter and honey, use to make a rustic sandwich, or have alongside some soup – artisan style bread is a perfect item for the cooler months, especially because that oven’s bound to have heated up your kitchen by then too!